Svelte JS : VSCode configuration and internationalization
6 mai 2020 · 5 min read

Svelte is a set of tools to develop Javascript applications (yet another new JS framework). It is a direct competitor of React or VueJS. After having tried it, I confirm that this project is to be followed with interest.
I share here some points that are not covered in the official Svelte documentation :
What is Svelte ?
Its creator Rich Harris works at the NY Times. He is in charge of developing the newspaper’s online rendering.
At the end of 2016, he starts from a simple observation: we send too much Javascript in web applications. Indeed, VueJS and React, among others, are embedded in the application, hence a greater volume. Moreover, the browser loses performance when interpreting the language and modifying the displayed rendering. His original publication is available on the Svelte blog.
His idea is that the framework should not be embedded in the application. It should just be used to compile in pure Javascript in order to deliver a light and fast to execute application.
The result is a weight of 3.6 Kb for an application compiled with Svelte against 45 Kb for the same application coded with React. And it is 10x faster because it runs without virtual DOM.
This framework is therefore particularly suitable for applications on mobile terminals or internet of things (IOT).
The Svelte project has been trending in 2019 with version 3, and today has more than 33,000 stars on GitHub.
Basic Svelte project
Install NodeJS to have the npm and npx commands available. An official template can be downloaded with the following command :
npx degit sveltejs/template myapp
cd myapp # go into the created folder
npm install # install project dependences
npm run dev # start the web app
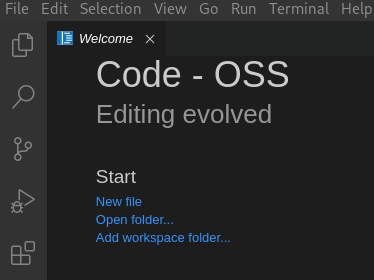
Go to http://localhost:5000/ in your browser to display the application :

Configuring “Visual Studio Code” for Svelte
A well-configured development environment (IDE) is very useful for writing clean code.
I recommend the use of Visual Studio Code which is free and cross-platform.
To install an extension, click on the EXTENSIONS icon in the sidebar and type a name to search :
vscode-icons extension
To have nice files icons, install the vscode-icons extension.
Svelte extension
At this point, if you are looking at the contents of a *.svelte file, the text is single colored. The Svelte extension by James Birtles will add syntax highlighting.
ESLint plugin and extension
This extension finds problems in your code and can fix them automatically in some cases. It also allows you to define convention rules for writing code (2 spaces instead of tabs…).
Install the ESLint extension by Dirk Baeumer.
The eslint-plugin-svelte3 plugin is required for ESLint to examine the Javascript code in the *.svelte files.
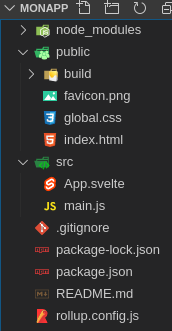
Open the myapp folder in VSCode.
In a terminal type the command :
npm install eslint eslint-plugin-svelte3 --save-dev
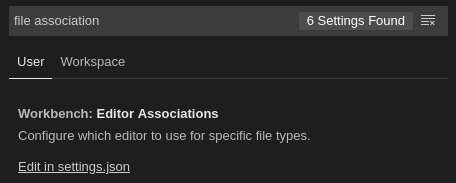
Then go to the VSCode settings, look for association file and click on Edit in settings.json.
Add the following lines so that the *.svelte files are considered as HTML :
"files.associations": {
  "*.svelte": "html"
}
In the same configuration file, and following the previous modification, let’s tell ESLint to look for Javascript errors in the HTML :
"files.associations": {
  "*.svelte": "html"
},
"eslint.validate": [
  "javascript",
  "html"
]
Create a .eslintrc.js file next to the package.json file then copy and paste this content :
module.exports = {
  parserOptions: {
    ecmaVersion: 2019,
    sourceType: 'module'
  },
  env: {
    es6: true,
    browser: true,
    node: true
  },
  plugins: [
    'svelte3'
  ],
  ignorePatterns: [
    'public/build/'
  ],
  overrides: [
    {
      files: ['**/*.svelte'],
      processor: 'svelte3/svelte3'
    }
  ],
  extends: [
    'eslint:recommended'
  ],
  rules: {
    semi: ['error', 'never'], // remove ;
    quotes: ['error', 'single'], // " -> '
    indent: ['error', 2, // 2 spaces indent
      { "SwitchCase": 1 }],
      'object-curly-spacing': ['error', 'always'],
      'array-bracket-spacing': ['error', 'always']
  }
}
You are free to modify the rules according to your habits. The options are available on the ESLint site.
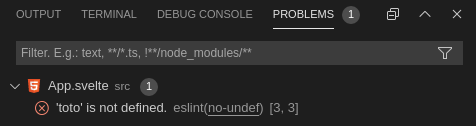
Now if you type toto in the <script> part of the App.svelte file, you are informed that this variable is not set :
To automatically check and correct all files in the project, in the "script" part of package.json, add the line :
"lint": "eslint . --fix --ext js,svelte"
You can then occasionally type the following command to correct the project code :
npm run lint
Multilingual application (i18n)
Here’s how to automatically translate your application’s interface according to the browser’s language. You don’t need a third part library for this.
Create one translation file per language in the src/locales directory. For example fr.json :
{
  "about": "A propos",
  "hello": "Bonjour"
}
and en.json :
{
  "about": "About",
  "hello": "Hello"
}
The Rollup bundler needs a plugin to import JSON files. In a terminal, type :
npm install @rollup/plugin-json --save-dev
Edit the rollup.config.js file:
// add at the beginning of the file :
import json from '@rollup/plugin-json'

//...

// under the plugin line :
plugins: [
  json({
    compact: true
  }),

//...
Create the file src/i18n.js :
import * as fr from './locales/fr.json'
import * as en from './locales/en.json'

// getting the browser language
let userLang = navigator.language || navigator.userLanguage
if (userLang.length > 2) {
  userLang = userLang.substring(0, 2).toLowerCase()
}
if (![ 'fr', 'en' ].includes(userLang)) {
  userLang = 'en' // set a default lang
}

export const broswerLang = userLang
export const traductions = { fr, en }
We will use the Store to share translations through the application. Create the file src/store.js :
import { readable } from 'svelte/store'
import { broswerLang, traductions } from './i18n'

export const trad = readable(null, function start (set) {
  set(traductions[broswerLang])
  return function stop () {}
})
And to use a translation in one component, for example App.svelte, it’s as simple as that :
<script>
import { trad } from './store.js'
</script>

<h1>{$trad['hello']}</h1>
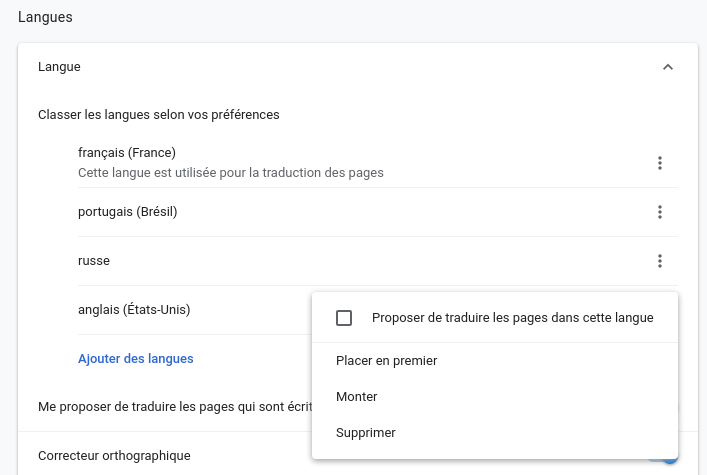
If you are using Chrome, type the address chrome://settings/languages to test internationalization by changing the browser language. Click ... on the chosen language then Place First and reload the application page:
CSS Frameworks
You may use an existing graphic design for your app. Here is a non-exhaustive list of CSS components provided for use with Svelte :